


****Revised 01/12/19****
The CLC 280 is beating my H150i Pro by 8c on a Core i7-2600k that I have a stable overclock of 5.0ghz at 1.48v while running Prime95 Blend. With my 9900k the CLC 280 hits 91c @ 4.8ghz, 1.312v, Prime95 Small FFT, while the 9900k throttles with the H150i. It's pretty sad that a smaller cooler is beating a bigger one that's made by the No.1 company in AIO cooling.
The only 2 drawbacks with the CLC 280 is the software is buggy and the fans are loud at 100%. I don't mind the loud fans because I favor performance but people who favor quiet over performance will. IMHO, someone who is seeking silence should look at a larger heatsink or a 240mm AIO cooler, and they should probably run their gear at or near stock settings.
If you're looking for the best AIO cooler on the market in terms of performance, then get the CLC 280. Just look at the independent benchmarks......... it beats everything.
*****Original Review********
Too many Pros to list. The fans that are used on the clc280 have decent Static pressure and this propels the clc280 over the older h115i and the x62 but these are very slight gains that aren't worth considering when push comes to shove.
-One of the best AIO coolers you can get. If you don't give 2 cents about abundant RGB lighting then get this.... I did. This one only has the bare minimum. Go check reviews of 280mm AIO coolers and you will see the EVGA clc280 tops all the charts, but like I said it's by a degree or 2 over the other 280mm radiators.
- I also have the older H115i that came with the SP series fans and the EVGA clc280 is much quieter when the fans are cranked to 100%.
-These 360mm AIO coolers really don't have much more cooling power than a good 280mm AIO cooler. What you have to look at is square mm or inches here. The 360mm x 120mm radiators only give you 10% more square area, but they only cool a degree or 2 better on an overclocked processor.
-The reason I go with an AIO cooler over a large heatsink is because it's easier to manage. Large heatsinks obstruct parts like the RAM, fan headers and sometimes they are too close to the 8-Pin CPU connector. These chunky heatsinks have become so bad that you need to go to their site to look up a compatibility list to see if they will work with your motherboard. The only pluses I can give a large heatsink is they cool better than a 120mm x 120mm AIO cooler, they won't leak, and the don't have a pump.
-EVGA! What a wonderful company to do business with. Best customer support in the hardware industry. My registered products list is a mile long because I know I'm getting a Top notch product with EVGA. When my GTX 590 died, the RMA was approved within 2 emails....... and I got a much better card in the end. One time I couldn't get a 790i motherboard to boot correctly which happened on a Sunday. Their support rep walked me through the steps and I got that board running in No Time. EVGA is a pleasure to do business with. I had no problems dropping $750 on a GTX 1080ti with these guys.
3 weeks ago I had a 10 email exchange with Corsair over a k95 keyboard.
-When I unboxed this cooler, it came with the 140mm fans installed and what was in the box seemed a little bit better organized than Corsair's offerings. I added this after I unboxed an H150i pro and all of this dawned on me after I spent 10+ minutes on organizing everything and installing the 3x 120mm fans on the H150i.
Cons:
These big AIO coolers do have more cooling power than a large heatsink like the D15 but it's not that much more when you think about it. You are going to get more bang for your buck with a Scythe Mugen 5 or the Fuma. If you have plans to do any real overclocking then get the EVGA clc280. If you want something that works well then get the Mugen 5.
-The link software/Flow Control doesn't run that great with AMD processors. If you're looking for an AIO cooler to run with a Ryzen CPU then get the Corsair. I loathe having to use the Link cable which I hate for many reasons. The cable is messy and it hinders cable management. Corsair and NZXT uses this able too. I had a problem with the H115i I bought a couple years ago for a Core i7-6800k, and I could not get it resolved until I found an unrelated thread that said to turn off all Windows power saving features to the USB 2.0 ports in Device Manager.
-No matter what you get, it's an Asetek cooler. The only difference between one or the other is the fans that are used, and which generation Asetek pump it has. These are generally all the same so if you're going to buy one then you might as well buy an EVGA since it cools a degree or 2 better than the H115i or the x62 and you get EVGA's unrivaled customer support. The EVGA clc280 used the Asetek Gen 5 pump but the newer H150i Pro and the newer H115i Pro used the 6th Gen Asetek pump.
-You have to run the fans at max, which is quite loud, for it to get the performance that buries larger heat sinks.
-There is always a chance it will leak. Although I have owned many Corsair AIO coolers and not one of them has ever leaked. The older coolers from 2011-2013 had a higher chance of leaking because AIO coolers from 5 years ago aren't as well refined as today's AIO coolers. You have a much higher chance of the pump dying. I've studied anxiety and CBT and even if there is a 1 in 10k chance of something happening, people will still freak out about it. EVGA, Corsair, and NZXT will pay for the parts that are damaged by a leak just as long as you correctly installed the cooler and you didn't modify it.
-The Flow software is buggy. EVGA seems to have software issues with many of their products so no surprise here. If I select to have the Flow software run on startup, it will fail.
Enjoy fast, free delivery, exclusive deals, and award-winning movies & TV shows with Prime
Try Prime
and start saving today with fast, free delivery
Frequently bought together

$142.50
Get it as soon as Friday, May 17
Only 2 left in stock - order soon.
Total price:
To see our price, add these items to your cart.
Choose items to buy together.
Featured items you may like
Page 1 of 1 Start overPage 1 of 1
From the manufacturer

|
|
|
|
|---|---|---|
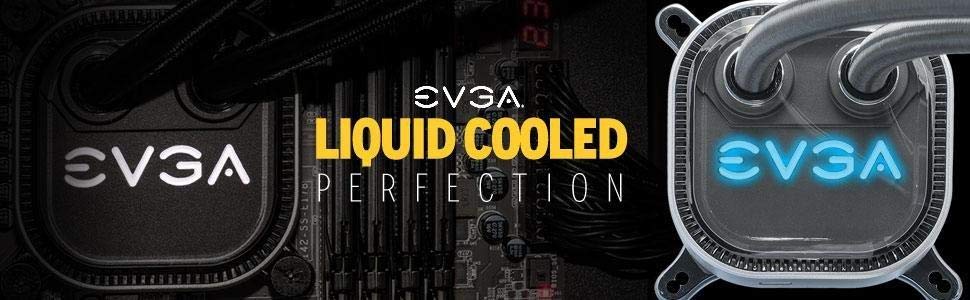
Built To PerformNew cooling block offers improved flowrate and heat transfer surface area for incredible cooling efficiency. |
RGB LEDBuilt in RGB LED gives you full control over the lighting including color cycling, or select your favorite color. The color profiles even save to the firmware. |
Sleeved TubingFully sleeved tubing from radiator to CPU block. |


Videos
Page 1 of 1Start OverPage 1 of 1
Videos for this product

0:42
Click to play video
Customer Review: EVGA 240MM CPU cooler work great
Anthony
Videos for this product
0:13
Click to play video
Customer Review: Really good value aio cpu cooler!
Denny Mahardika
Videos for this product
6:59
Click to play video
EVGA CLC overview
EVGA
Reviews with images
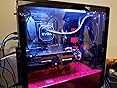
Great cooler
Looks great, works great. Good temps. Easy installation and set up. Fans will go up to 3000 rpm and get a bit noisy. It is easily adjusted with their software. Software is easy to use. i7 12700k @5.0 running 45-49 celcius while gaming. Turbo on, not overclocked. 20's @ idle.
Top reviews from the United States
There was a problem filtering reviews right now. Please try again later.
Reviewed in the United States on June 10, 2018
Reviewed in the United States on April 26, 2024

Size: 280mmStyle: CLCxVerified Purchase
Looks great, works great. Good temps. Easy installation and set up. Fans will go up to 3000 rpm and get a bit noisy. It is easily adjusted with their software. Software is easy to use. i7 12700k @5.0 running 45-49 celcius while gaming. Turbo on, not overclocked. 20's @ idle.
Images in this review

Reviewed in the United States on October 12, 2017
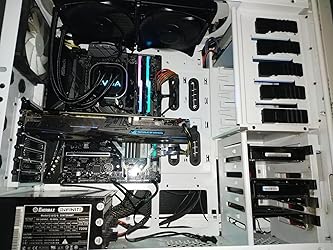
Packaging - So for newbie builders (such as myself) let me first start off by saying that the box this ships in is rather huge! The packaging of of this cooler is really big and for a moment feels intimidating when thinking that you'll have to fit this in your tower. The box came packaged in a shiny black sleeve with EVGA's branding over it. The brown box slides out easily and there is only one sticker/seal that you have to slice in order to get to the goodies inside. Inside the actual cooling block has thermal paste (by Shin Etsu) pre-applied and is of great quality, this is all protected by a plastic covering and is neatly tucked in between its foam cutouts. The radiator is the biggest thing in the box (obviously) and is also tucked away neatly in the foam cutouts with all of its cables/wires folded and tied. Overall presentation and packaging upon opening is excellent. There is also a small opening in the foam in the middle that is housing several ziplock bags full of all different screws and clamps and brackets, all neatly labeled for what board you are using them for (AMD vs Intel).
Installation - One word, EASY! As a novice builder, making my 2nd pc after 15 years this was super easy to install and i had no trouble with it whatsoever. The first thing i did was take the plastic cover off the block and swap the pre-installed Intel mounting bracket with the AMD one included. All you have to do is turn it counter-clockwise and it will pop right off (use a bit of force, dont be afraid it wont break). Once i did that (i put the plastic cover back on to protect the thermal paste) i began to install the radiator. In my Phanteks P400 case the only space i had for such a huge radiator was the front of my system (attached a pic for reference). I had to remove the original preinstalled case fan to the top of my case otherwise this wouldnt fit, it practically takes up the entire front space. Once the radiator was installed i was able to pop the block right onto the cpu mount, line it up perfectly and start tightening it down. One step i forgot to mention is that you need to install the mount bracket to your mother board prior to anything else so that your cpu block can rest on that, these are the screws that are double sided, they screw into the plastic bracket usually underneath the motherboard and then the brackets of the cpu clamp just slide on top and you close the top with another screw. More detailed instructions are in the included booklet - Overall very straight forward and easy
Performance - I have thrown literally every game and ultra settings (paired with a GTX 1080TI) and have never had my processor go above 47 degrees (celcius). I enabled a feature in the EVGA flow process APP to have the RGB lighting indicate if the temp is running hot. Blue means its cool and red means its getting hot. This has never turned red even once and i have had gaming sessions (including gamestreaming to a shield tv) for multiple hours at a time, no heating issues whatsoever. Compared to the 120MM CLC model, that one used to get hot after about 30 minutes of playing an intensive game like Doom 2016. It would then force pressure on the rest of the system causing my graphics card fan to go insane (honestly not 100% sure if this was interrelated but it stopped happening once i got this clc). This offers better performance (in my opinion) than the Nzxt Kraken or other CLC CPU coolers out there. Another important factor is the noise level. I can barely here this thing when its in my Phanteks P400 case. There is minimal to no noise at all of the radiator fans.
Quality - The build quality of this is exceptional. It feels like a premium product and the most important part, the tubes, are braided strongly and dont look like they will wear out or break. I was not scared at all that i may be bending them too much or that they could snap off easily.
Overall Result - The EVGA CLC 280 Liquid / Water CPU Cooler is (in my opinion) the best liquid cooler (asides from custom water loop coolers) that you can buy in the market now for your CPU. It is very competitively priced and offers superior cooling compared to is little brother variants and competition. It also offers little to no fan noise which makes it pleasant to sit next to and game for multiple hours without feeling like you're at an airport tarmac! I highly recommend this to anyone with the budget to spend, plans to do extensive gaming and would like to have a liquid cooled CPU without spending hundreds of dollars on a custom water cooled setup. Dont hesitate before buying this. EVGA has made another high quality product.

Super Quality and Value, The Best CLC Liquid Cooler out there
Reviewed in the United States on October 12, 2017
I purchased this 280MM cooler after the original 120 CLC cooler by EVGA wasnt cutting my needs. This offers exceptional cooling capabilities and offers most bang for buck vs competitors. Read below for a more detailed review.Reviewed in the United States on October 12, 2017
Packaging - So for newbie builders (such as myself) let me first start off by saying that the box this ships in is rather huge! The packaging of of this cooler is really big and for a moment feels intimidating when thinking that you'll have to fit this in your tower. The box came packaged in a shiny black sleeve with EVGA's branding over it. The brown box slides out easily and there is only one sticker/seal that you have to slice in order to get to the goodies inside. Inside the actual cooling block has thermal paste (by Shin Etsu) pre-applied and is of great quality, this is all protected by a plastic covering and is neatly tucked in between its foam cutouts. The radiator is the biggest thing in the box (obviously) and is also tucked away neatly in the foam cutouts with all of its cables/wires folded and tied. Overall presentation and packaging upon opening is excellent. There is also a small opening in the foam in the middle that is housing several ziplock bags full of all different screws and clamps and brackets, all neatly labeled for what board you are using them for (AMD vs Intel).
Installation - One word, EASY! As a novice builder, making my 2nd pc after 15 years this was super easy to install and i had no trouble with it whatsoever. The first thing i did was take the plastic cover off the block and swap the pre-installed Intel mounting bracket with the AMD one included. All you have to do is turn it counter-clockwise and it will pop right off (use a bit of force, dont be afraid it wont break). Once i did that (i put the plastic cover back on to protect the thermal paste) i began to install the radiator. In my Phanteks P400 case the only space i had for such a huge radiator was the front of my system (attached a pic for reference). I had to remove the original preinstalled case fan to the top of my case otherwise this wouldnt fit, it practically takes up the entire front space. Once the radiator was installed i was able to pop the block right onto the cpu mount, line it up perfectly and start tightening it down. One step i forgot to mention is that you need to install the mount bracket to your mother board prior to anything else so that your cpu block can rest on that, these are the screws that are double sided, they screw into the plastic bracket usually underneath the motherboard and then the brackets of the cpu clamp just slide on top and you close the top with another screw. More detailed instructions are in the included booklet - Overall very straight forward and easy
Performance - I have thrown literally every game and ultra settings (paired with a GTX 1080TI) and have never had my processor go above 47 degrees (celcius). I enabled a feature in the EVGA flow process APP to have the RGB lighting indicate if the temp is running hot. Blue means its cool and red means its getting hot. This has never turned red even once and i have had gaming sessions (including gamestreaming to a shield tv) for multiple hours at a time, no heating issues whatsoever. Compared to the 120MM CLC model, that one used to get hot after about 30 minutes of playing an intensive game like Doom 2016. It would then force pressure on the rest of the system causing my graphics card fan to go insane (honestly not 100% sure if this was interrelated but it stopped happening once i got this clc). This offers better performance (in my opinion) than the Nzxt Kraken or other CLC CPU coolers out there. Another important factor is the noise level. I can barely here this thing when its in my Phanteks P400 case. There is minimal to no noise at all of the radiator fans.
Quality - The build quality of this is exceptional. It feels like a premium product and the most important part, the tubes, are braided strongly and dont look like they will wear out or break. I was not scared at all that i may be bending them too much or that they could snap off easily.
Overall Result - The EVGA CLC 280 Liquid / Water CPU Cooler is (in my opinion) the best liquid cooler (asides from custom water loop coolers) that you can buy in the market now for your CPU. It is very competitively priced and offers superior cooling compared to is little brother variants and competition. It also offers little to no fan noise which makes it pleasant to sit next to and game for multiple hours without feeling like you're at an airport tarmac! I highly recommend this to anyone with the budget to spend, plans to do extensive gaming and would like to have a liquid cooled CPU without spending hundreds of dollars on a custom water cooled setup. Dont hesitate before buying this. EVGA has made another high quality product.
Images in this review
Top reviews from other countries

Max Payne
Better options out there for the money
Reviewed in Canada on October 1, 2023Size: 280mmStyle: CLCxVerified Purchase
Max Payne
Reviewed in Canada on October 1, 2023
Images in this review

Jeremy J. Rivero
Cumple con su función y no decepciona.
Reviewed in Mexico on April 8, 2023Jacob
Perfect for your Alienware Aurora R12
Reviewed in Canada on February 23, 2022Jacob
Reviewed in Canada on February 23, 2022
note: I also ordered Noctua thermal compound. this is a good idea, as the Aurora chassis generates a lot of ambient heat inside of the case, which could shorten the life and effectiveness of a lesser thermal compound. Of course the supplied thermal compound is sufficient and hassle free, so pick whichever you prefer.
1. Remove case side panel and top cover. Remove top cover by gently prying one of the corners of the top shroud, with your fingernail. this will remove somewhat easily, and dont worry about breaking it, its very sturdy and designed for removal this way.
2. Remove the stock Air CPU cooler. remove cable from motherboard, and remove the 4 screws on each corner of the air cooler, loosening screws evenly until fully unscrewed.
3. clean off the old thermal compound from the IHS (internal heat spreader i.e. top of your processor). rubbing alcohol and several q-tips makes cleaning a breeze. be sure to remove all compound and residue for best thermal contact with zero air bubbles.
4. remove top-fan. remove the 2 screws on either side of the fan bracket on the top of the interior of the case. once the fan assembly is removed, cut the rubber pins out and remove them entirely. this can be done with scissors, a utility knife, or simply by pulling on them until they break apart.
5. take your new Asetek (uhh I mean, EVGA) liquid cooler, from the box, remove the plastic cover from the waterblock assembly, and remove the thermal compound from the copper plate. Be careful not to scratch or score the copper, as it is important to remain as flat as possible to avoid any air pockets. Take q-tips and rubbing alcohol to remove stock compound, making sure not to leave any fibres from the q tip behind. blow them off, do not touch copper with your finger. NOTE: if you are using the already applied thermal compound, of course skip this step.
6. if you have removed the compound and are using your own, place plastic cover back onto the underside of the waterblock. this will protect the copper from damage during installation.
7. install the radiator to the top of the case, placing the water hoses to the RIGHT. Lay your case on its side, and hold the radiator from inside, while you screw in radiator from the top. there are 4 screws clearly marked on the top of the exterior of the case.
8. Once the radiator is installed, take the mounting bracket for the waterblock and install it to the waterblock. Place the bracket on the underside of the block, and turn it until it locks into place. NOTE: this is where you can choose the orientation of the block. I have mine slightly angled for aesthetics and less stress on the hoses.
9. Once the locking bracket is installed on the block, leave the waterblock covered, and off to the side. Place thermal compound onto the IHS of the CPU ( compound bead should be about the size of a grain of rice. the more, can mean the messier, and not necessarily help performance.)
10. Place water block onto the 4 standoff points of the motherboard surrounding the CPU, you will see 4 of them in the shape of a square. Place the waterblock on the standoffs matching with your chosen block orientation and screw-holes on the bracket, to the standoffs on the motherboard. Screw them in with the supplied thumb-screws. Once all 4 thumb-screws are hand-tightened, gently fasten them with a screw driver, applying even and gentle pressure. Do not overtighten! very slightly over hand tightened is all we want.
11. Install the top fan onto the underside of the radiator in the case. Make sure that the fan sticker, is facing the direction you want your air to flow. in this case we want the air exhausting up and out, so place the fan sticker, hidden side up facing the radiator, this direction will pull air out of the case. Install the 4 long screws, fastening the fan to the top - mounted radiator. You can move the water hoses around to make using your screw driver easier, fastening the 4 screws.
12. plug in your fan connector as well as your CPU block to the marked connectors on the motherboard. these are marked TOP FAN and CPU
There you have it, I hope this helped as the instructions supplied in the box were somewhat vague. I have owned several closed loop coolers from my builds over the years and each seem to have loose directions, so im not docking any points for that one.
FINAL NOTE: I opted to use the factory DELL fan for the top fan cooling my radiator. this is because the fan supplied with the cooler, runs at 100% due to DELLS ALIENFX Software. This is fine, if you want maximum cooling performance, it works well as I tried it with the EVGA fan and saw load temps as low as 39 degrees C running Blender. Finally I opted to go with the DELL fan as it works with AlienFX and its automatically controlled, no longer running at 100%.
Images in this review


Anderson Serra
Muito bom produto
Reviewed in Brazil on July 6, 2021Size: CL24Style: RGBVerified Purchase
